pfSense IPSec VPN Tunnel Configuration
IT Glue Documentation · Advanced Technical Manual (1:1 Output)
Phase 1 Configuration
1
Navigate to VPN Menus
From the top navigation bar, click on VPN, then select IPsec from the dropdown.
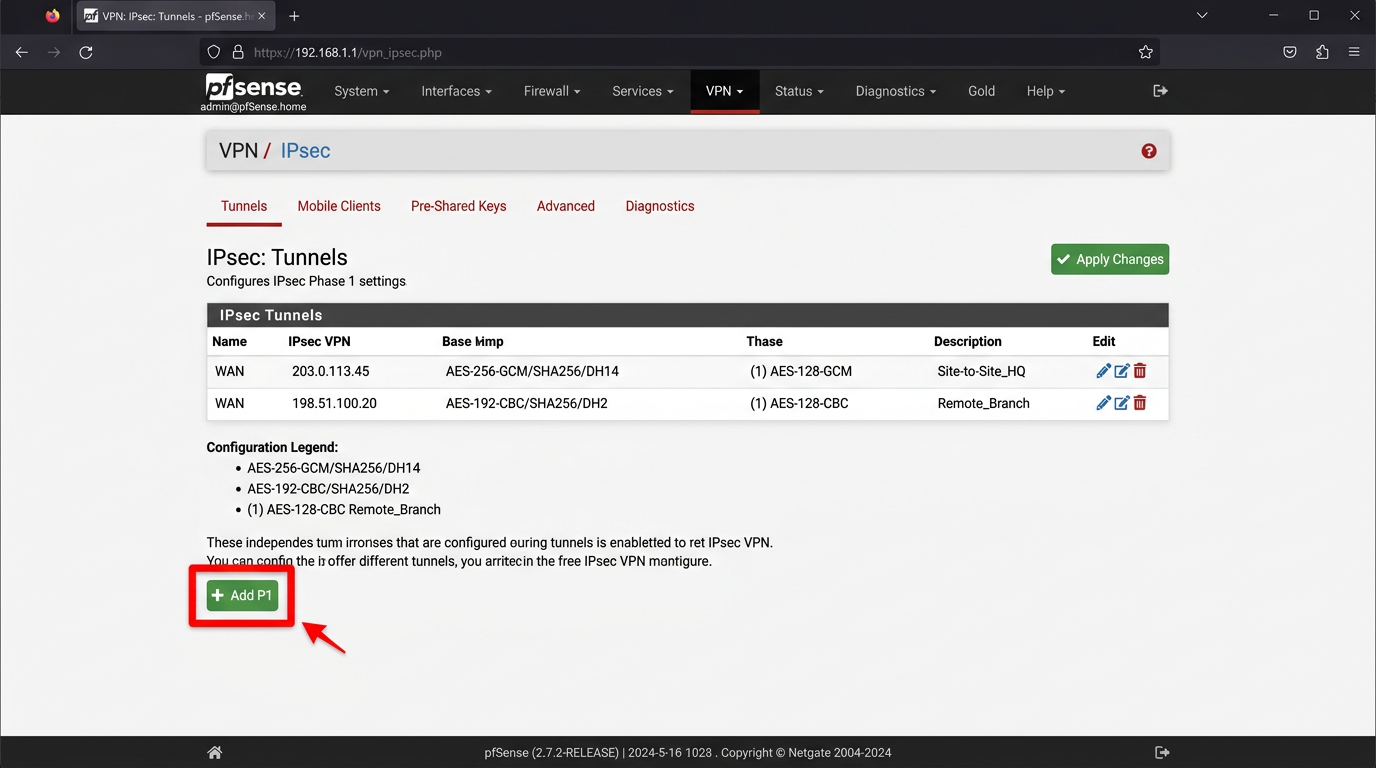
2
Add P1 Entry
Click the green "Add P1" button at the bottom left of the Tunnels tab.
3
Set IKE Endpoint Configuration
Set Key Exchange version to IKEv2. Set the Remote Gateway to the public IP of the peer site (e.g., 203.0.113.50).
4
Configure Authentication
Under Phase 1 Proposal (Authentication), set Authentication Method to Mutual PSK. Generate and paste a 32-character Pre-Shared Key.
5
Set Encryption Algorithms
Under Phase 1 Proposal (Encryption), select AES with 256-bit key length, SHA256 for Hash, and DH Group 14.
6
Save Phase 1
Click Save at the bottom, but do not apply changes yet. Click the "Show Phase 2 Entries" button next to the newly created P1.
Phase 2 Configuration
7
Add P2 Entry
Click "Add P2" under the expanded Phase 1 section.
8
Define Local and Remote Networks
Set Local Network to LAN subnet. Set Remote Network to Network and enter the peer's internal CIDR (e.g., 10.50.0.0/24).
9
Set Phase 2 Encryption
Under Phase 2 Proposal, check AES-256-GCM with 128 bit hash. Uncheck everything else. Set PFS key group to 14.
10
Apply Configuration
Click Save, then click the yellow "Apply Changes" banner at the top of the screen to reload the IPsec daemon.
# CLI verification command to check IPsec status
ipsec status